Installing PCBWorks
Contents
- Initial Install
- Running the Installer
- License Agreement
- Account Log-In
- Select Design Functionality
- Destination Folders
- Ready To Install
- Installing PCBWorks
- Installation Complete
- Licensing PCBWorks
- License Types
- License Availability, Selection and Configuration
- Extending the Capabilities of PCBWorks
- Installing Multiple Instances of the Software
- Installation Folders
- Identifying the Right Folder
- Importing Preferences from a Previous Version
- Changing Installed Core Functionality after Installation
- From PCBWorks
- From Windows
- Updating to a Later Version
- From PCBWorks
- From Windows
- Uninstalling
Parent page: Installation Overview
Installation of any software application should be straightforward, intuitive and, perhaps above all, fast. Furthermore, when you have that software installed, you want to be able to update it as and when you deem necessary, and in a streamlined fashion.
PCBWorks provides a fast, efficient Installation Management System that caters for this very need – a system that not only expedites the initial installation process, but lets you handcraft the features available to that software at any time after installation.
Initial Install
Initial installation of PCBWorks is performed using the PCBWorks Installer. This wizard-based installer is accessed by running a small (approx. 9MB) executable – PCBWorksSetup.exe. This executable is included in a zip file of requisite installables, acquired after purchase of PCBWorks, and can be saved anywhere on your hard disk.
Running the Installer
Double-click the PCBWorksSetup.exe file. The PCBWorks Installer welcome page will appear.
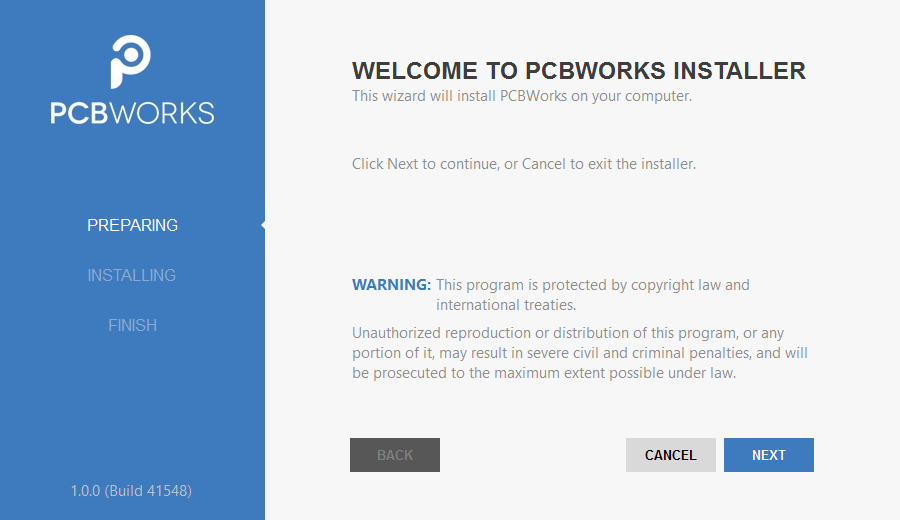
Initial welcome page for the PCBWorks Installer.
The installer itself is wizard-based, providing a set of progressive (and intuitive) pages that collectively gather the information to effectively install the version of the software, and its initial feature set, as you require.
Click NEXT to continue. The following sections provide a summary of the various pages you will encounter.
License Agreement
This page of the Installer presents you with the Altium End-User License Agreement (EULA).
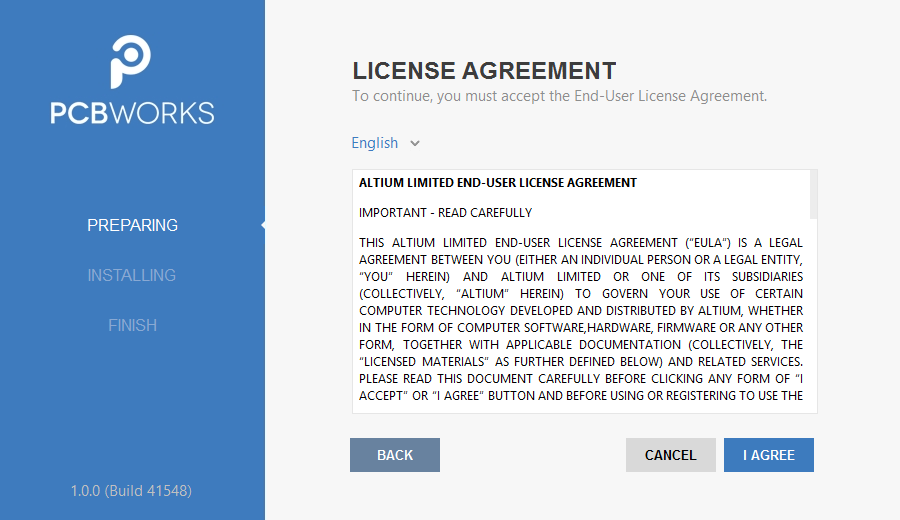
Read and accept Altium's End-User License Agreement.
Before you can continue with the installation of the software, you must read through, and accept, the terms of this agreement. The agreement can be viewed in different languages, including English (the default), Chinese and Japanese.
With the EULA read, continue with the install by clicking the I AGREE button.
Account Log-In
You will now be presented with an Account Log In pop-up window. This simply means logging in to your PCBWorks Account, using the applicable and associated account credentials. The reason for this is two-fold:
- Firstly, it verifies your identity and that installation of the software is valid, as determined by your account.
- Secondly, it provides secure access to the Altium Vault in which the installation files reside – the files that are required to be downloaded before the software can be ultimately installed on the PC.
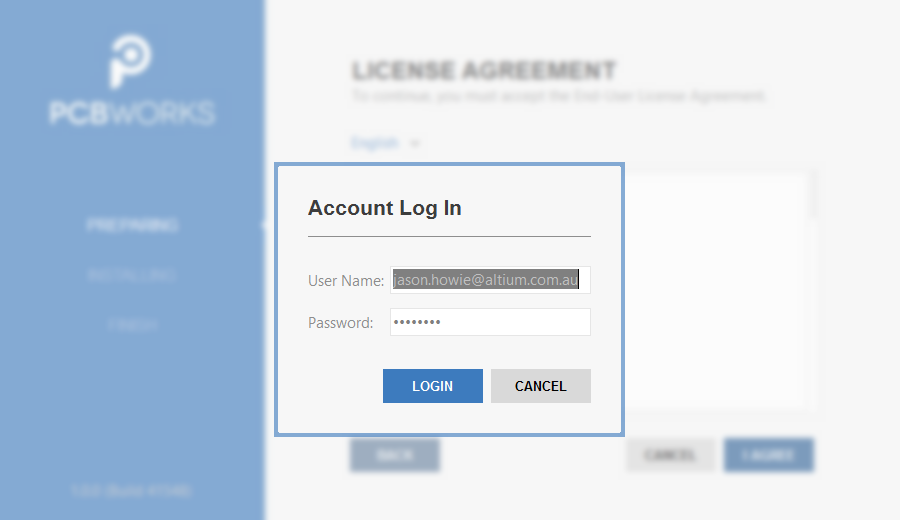
Log in to your PCBWorks Account.
Select Design Functionality
This next page of the Installer allows you to specify which features are installed initially. The PCB Design option provides the base software and core technologies required to perform PCB design. It is always installed and cannot be deselected. Use the remaining options to tailor the install to suit your needs. This will also have an impact on the initial installation time too!
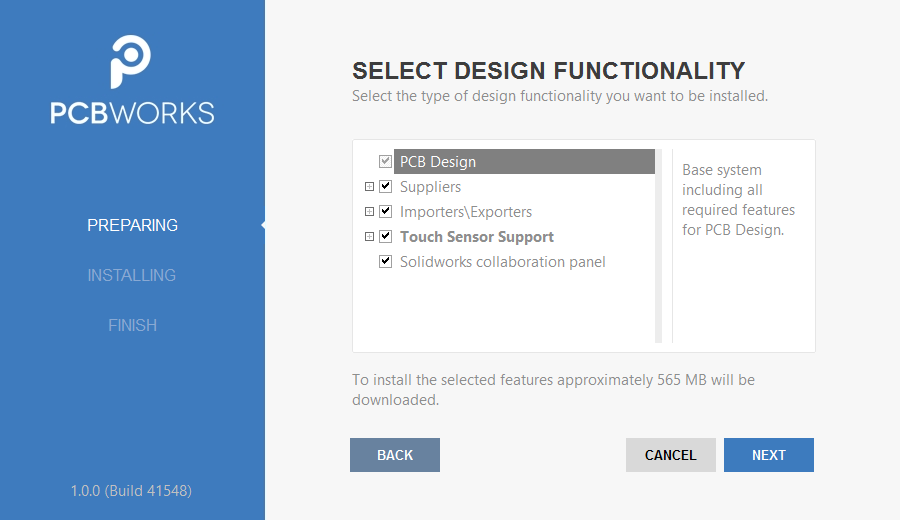
What initial functionality would you like in your installation of PCBWorks? - The choice is yours!
Simply click to enable the functionality you require. As you select and deselect functionality, text at the bottom of the page dynamically updates to reflect the size of the download involved.
Remember, no matter what decision you take at initial install, you can add or remove features and functionality at any stage after installation. This puts you in the driving seat as it were, to fully customize your installation in-line with your, possibly ever-changing, design needs.
After defining what functionality you'd like, click NEXT to proceed.
Destination Folders
This next page of the Installer allows you to specify the destination folders for the install, in terms of both the Program Files for the software and the Shared Documents that are accessed and used by the software.
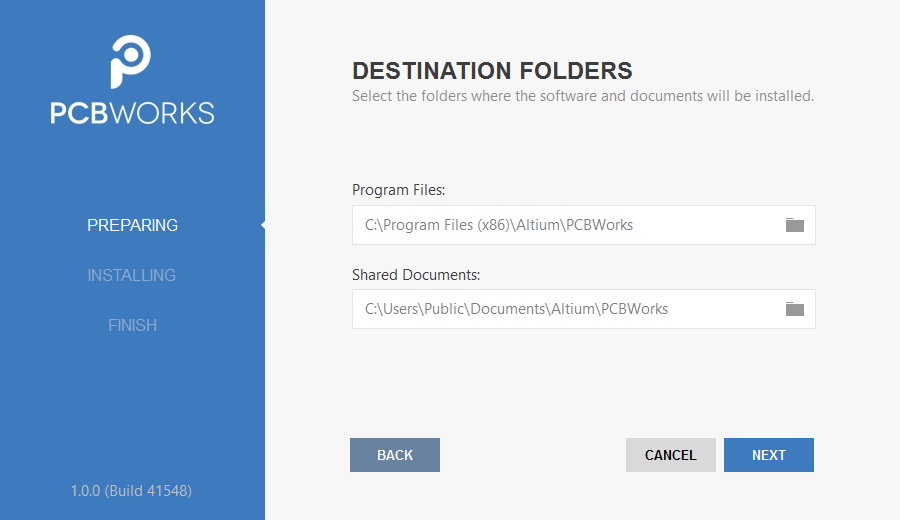
Specify where the software and associated documents are to be installed.
These locations become especially important when installing multiple instances of PCBWorks. If one or both of these destinations is not currently an empty folder (i.e. devoid of content) you will be prevented from proceeding with the installation until you specify alternate (and empty) destination(s).
The default destinations (based on Windows 8/Windows 7 OS) are:
Program Files
C:\Program Files (x86)\Altium\PCBWorks
Shared Documents
C:\Users\Public\Documents\Altium\PCBWorks
To specify alternate locations, simply type the location directly into the applicable field, or click the folder icon at the right of a field and browse for the required destination folder.
Once the install locations are specified, click NEXT to continue.
Ready To Install
The Installer now has all the information it requires to proceed with the installation. If you need to change anything, click the BACK button. If you want to cancel out of the install, click CANCEL.
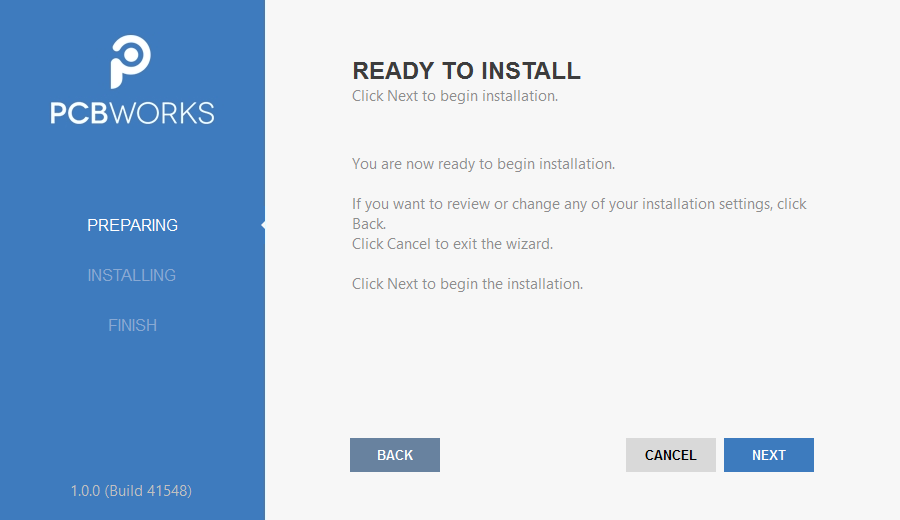
Ready to begin the install!
To go ahead and proceed with the installation, click NEXT.
Installing PCBWorks
The Installer now changes from the Preparing phase to the Installing phase, as reflected in the Installer's left-hand pane. Installation proceeds, with the required files first being downloaded (from the secure cloud-based Altium Vault). Progress of this download is displayed within this next page of the Installer.
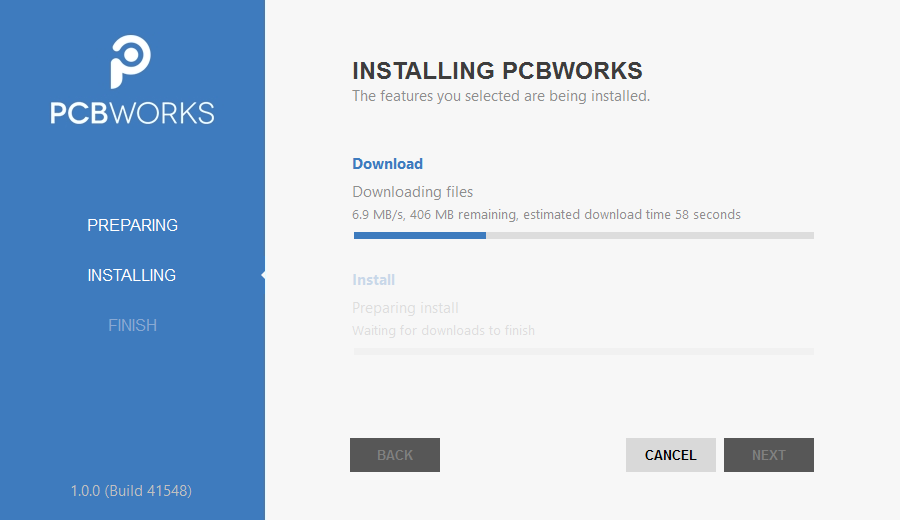
Installation commences by downloading the required set of install files.
Once the download of files is complete, they will be installed, again with progress displayed in the Installer.
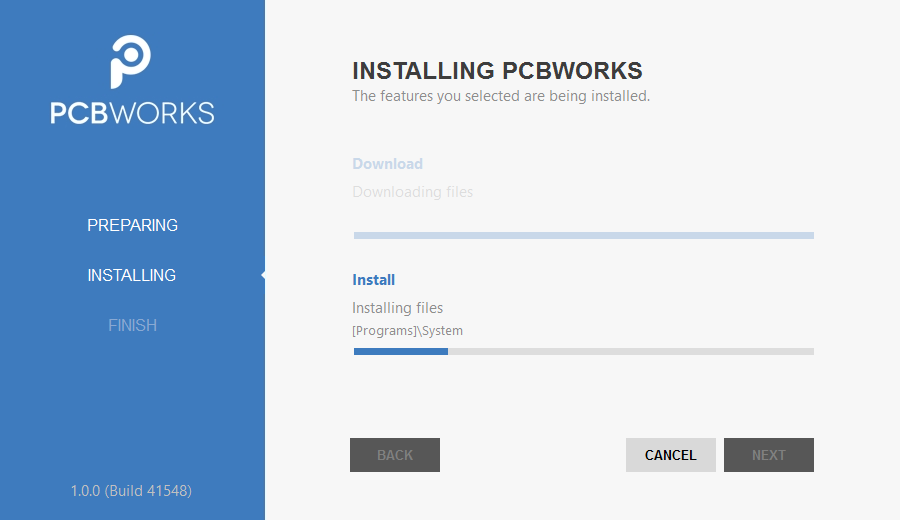
After the download is complete, the software is then installed.
Installation Complete
When the installation itself completes, you have reached the end of the Installer wizard.
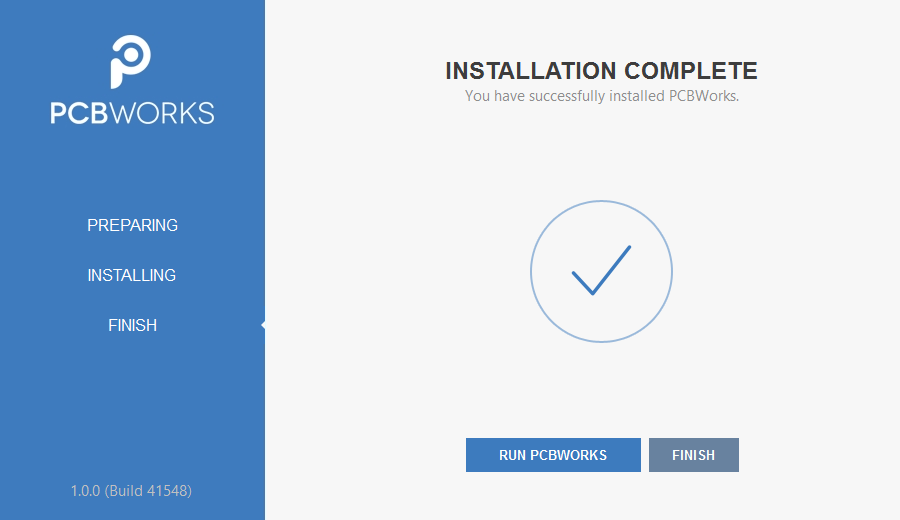
That's it, installation is complete!
To exit the Installer and launch PCBWorks, simply click RUN PCBWORKS. To exit without launching the software, click FINISH.
That's it. You have installed PCBWorks on your computer, and initially tailored its functionality to suit your design needs. Now it's time to do what you do best, and go create that next innovative design.
Licensing PCBWorks
Main article: PCBWorks Licensing System
PCBWorks includes a streamlined licensing system, enabling you to get licensed and up-and-running with your PCBWorks Software in a timely and efficient manner. The system offers various licensing types to meet, and suit, your licensing needs. This includes web-based, on-demand licensing. Tightly integrated with customer accounts through the Altium portal, web-based on-demand license management allows a license to be used on any computer without the need to move license files or activate on each machine. This provides a global floating license capability – within the geographic scope of your license and the conditions set out in the EULA – without needing to implement your own server.
License Types
The PCBWorks licensing system features three distinct license types:
- On-Demand – client-side license acquisition is administered by an Altium managed server. There are two 'modes' when using a seat of an On-Demand license:
- On-Demand – a seat of an On-Demand license acquired by any client computer, only while you are signed in to your account. When you sign out, the seat is released so that another user can acquire it.
- Roaming – a seat of an On-Demand license acquired for a specified time. In this mode, you can sign out and work offline, in essence roaming freely with your acquired seat
- Standalone – client-side license acquisition is managed by the user through use of a standalone licensing file (
*.alf). This file can be saved, copied and backed-up as required. The.alffile is reusable on a home computer (in accordance with the EULA) simply by copying the file to a specific folder on that computer and then adding the file as part of Standalone License Configuration. - Private Server – client-side license acquisition is administered by a user-managed server. Your administrator sets up a Private License Server to access and use Private Server licenses. Once the license is in use on the server, that server will then serve the license to local computers. Users on the local network do not need to sign in to their PCBWorks accounts to acquire the seats from the Private License Server.
License Availability, Selection and Configuration
License configuration and selection is performed from the My Account area – one of several views available under PCBWorks's Home page. Access this area by clicking the My Account link, in the Tasks pane of PCBWorks's Home page.
This is 'command central' for obtaining a license. Sign-in to your PCBWorks account to view and choose from the On-Demand and Standalone licenses available to you (those purchased and associated with your account). Alternatively, add a Standalone license file, or connect to your Private License Server, and use a seat from any of the associated Private Server licenses made available to you by your network administrator.
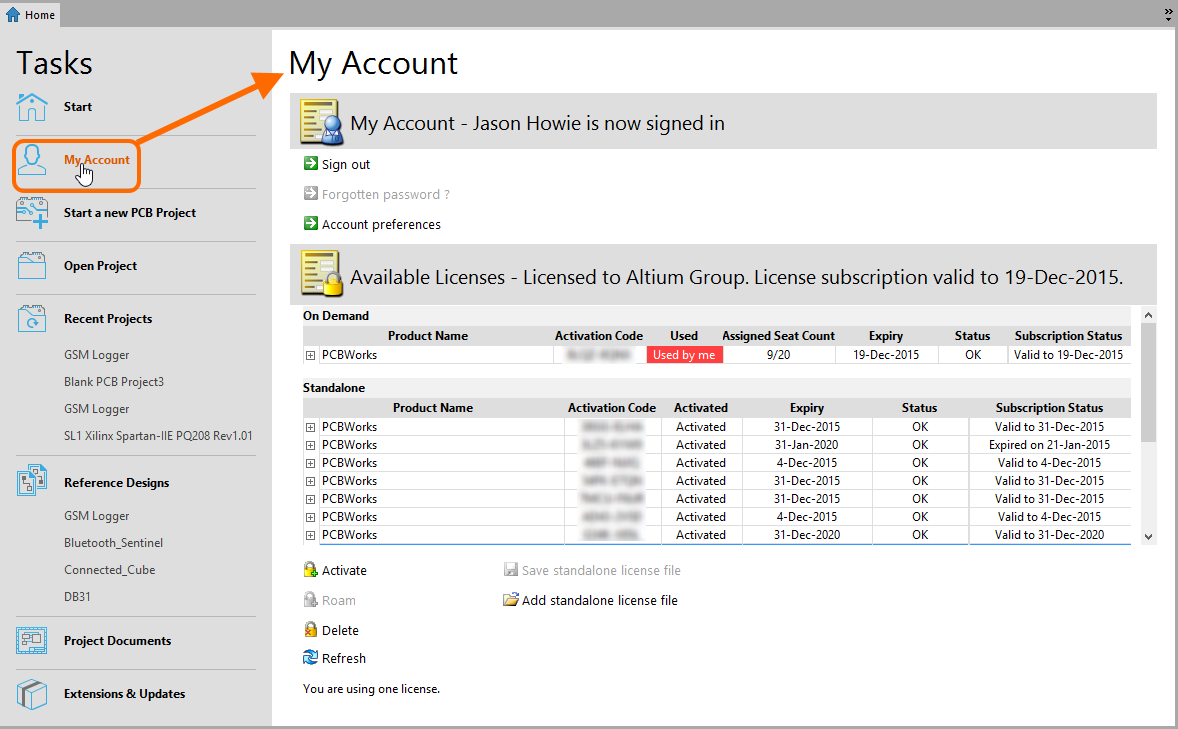
Accessing the My Account area.
Extending the Capabilities of PCBWorks
Facilitating the ability to enhance your PCBWorks instance, customization of the software is made possible through the concept of Extensions. This is a key concept of the system to understand. An extension is effectively an add-on to the software, providing extended features and functionality. A core set of features and functions are installed and handled transparently as part of the initial install, referred to as System Resources. In addition, Optional Extensions are available – packets of functionality that are optionally installed or removed by the user as required. It is the extension concept that enables the installation to be handcrafted in accordance with design needs.
Within PCBWorks, management of extensions for the software is performed from within the dedicated Extensions & Updates area – one of several views available under PCBWorks's Home page. Access this area by clicking the Extensions & Updates link, in the Tasks pane of PCBWorks's Home page.

Accessing the Extensions & Updates area - command central from which to efficiently manage the functionality available to the software.
Installing Multiple Instances of the Software
Once the base version of PCBWorks is installed on a computer (e.g. 1.0), you can either update to a subsequent version (e.g. 1.1, 1.2, etc), or that subsequent version can be installed as a fresh and distinct instance. The Installation System supports the concurrent installation of different instances of the software. The beauty of installing different version instances is that it enables you to quickly access a previous version directly, and independently, whereas an update effectively replaces the earlier version with the later one.
When running the installer for a subsequent version of PCBWorks, an additional page of the PCBWorks Installer wizard will be available – Installation Mode. This page gives you the choice of either updating an existing version instance of PCBWorks, or installing as a separate new version instance. Choose the New installation option to maintain separate version instances of the software on the same computer. Remember to specify different destination folders for the new instance later in the wizard.
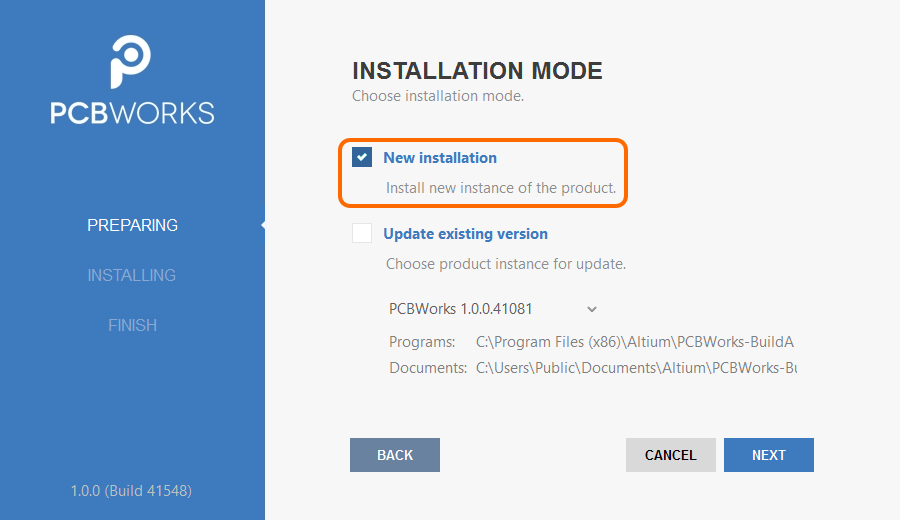
To install a separate instance, ensure the New installation option is chosen as the mode of installation.
Installation Folders
There are two important factors that facilitate the installation of multiple individual version instances of the software:
- The ability to specify different destination folders during the install, in terms of both the Program Files and Shared Documents install locations.
- The system's use of a Globally Unique Identifier (GUID) for each independent instance. This identifier – which uses the standard 128-bit URN model and is displayed as a 32-character hexadecimal number – is used to uniquely distinguish the application data folders, as well as entries in the registry. When you run a particular instance of PCBWorks, the system handles, through use of this identifier, only those files and registry entries specific to that instance.
The following is a summary of the default installation folders for PCBWorks, based on a Windows 8/Windows 7 OS.
- The default main installation path for PCBWorks is:
\Program Files (x86)\Altium\PCBWorks
- Examples, libraries, and templates for a default installation can be found in the following directory:
\Users\Public\Documents\Altium\PCBWorks
- System application data (including: Extensions, Portal Cache) and security (license .alf) files for a particular instance can be found in the following two directories:
\ProgramData\Altium\PCBWorks <GUID>
\ProgramData\Altium\PCBWorks <GUID>_Security
For two example instances, the paths might therefore be (inserting example GUIDs):
\ProgramData\Altium\PCBWorks {7DF7280E-CD03-40A9-A6A4-DDD057140F70}
\ProgramData\Altium\PCBWorks {7DF7280E-CD03-40A9-A6A4-DDD057140F70}_Security
\ProgramData\Altium\PCBWorks {566C1AFA-49CA-4B17-B7CB-70A2042D8DAC}
\ProgramData\Altium\PCBWorks {566C1AFA-49CA-4B17-B7CB-70A2042D8DAC}_Security
- User application data files (including: default preferences settings, default PCB view configurations, and last workspace) for a particular instance can be found in the following directory:
\Users\<ProfileName>\AppData\Roaming\Altium\PCBWorks <GUID>
For two example instances, and a user profile of Des Igner, the paths would therefore be:
\Users\Des Igner\AppData\Roaming\Altium\PCBWorks {7DF7280E-CD03-40A9-A6A4-DDD057140F70}
\Users\Des Igner\AppData\Roaming\Altium\PCBWorks {566C1AFA-49CA-4B17-B7CB-70A2042D8DAC}
- User local application data for a particular instance can be found in the following directory:
\Users\<ProfileName>\AppData\Local\Altium\PCBWorks <GUID>
For two example instances, and a user profile of Des Igner, the paths would therefore be:
\Users\Des Igner\AppData\Local\Altium\PCBWorks {7DF7280E-CD03-40A9-A6A4-DDD057140F70}
\Users\Des Igner\AppData\Local\Altium\PCBWorks {566C1AFA-49CA-4B17-B7CB-70A2042D8DAC}
Identifying the Right Folder
For the main program installation and shared documents folders, you have the ability to give those folders meaningful names, which can come in very handy for a machine containing multiple different version instances of the software. But for other folders, they are only distinguished by their GUID. Being able to tell you have the right folder for the right version instance suddenly becomes more difficult. However, help is at hand, to allow you to quickly identify the GUID used for the currently open instance of the software and, armed with that knowledge, pick the right folder through Windows Explorer.
The GUID can be identified from the Directory field for Temporary Mesh Data, on the PCB Editor - General page of the Preferences dialog (File » System Preferences).
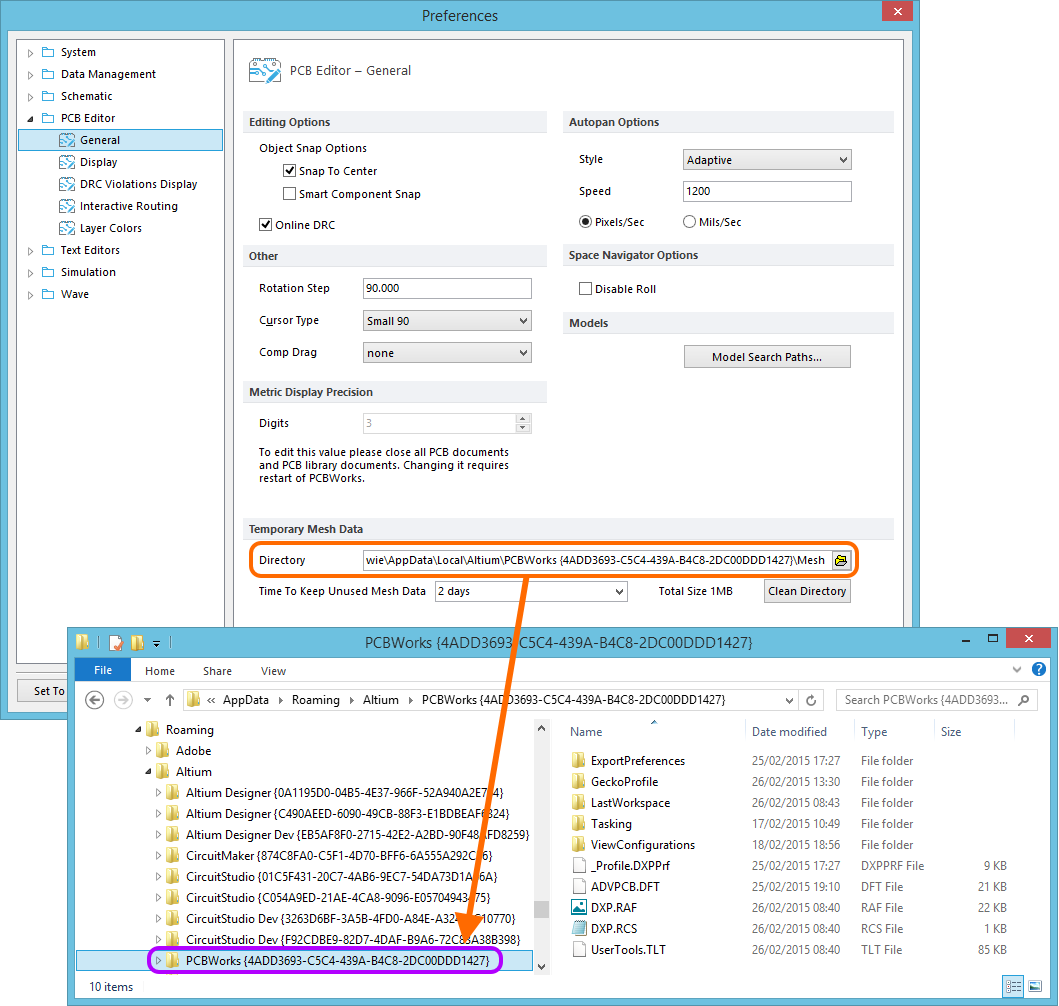
Identifying the GUID used for the active version instance of PCBWorks.
Importing Preferences from a Previous Version
After installing and launching a new version instance of PCBWorks, the designer is given the opportunity to import preferences from the most recent previous installation at startup. You have full control over whether to import all, or only some of the preferences, with the ability to select which preferences to import at the individual preferences page level.
If the option to import preferences on initial startup is not taken, don't worry – preferences can be quickly loaded, at any time, from within the Preferences dialog. Simply click the Load button at the bottom of the dialog, then browse to, and open, the required DXP Preferences File (_Profile.DXPPrf) for the previous version. This can be found in the \Users\<ProfileName>\AppData\Roaming\Altium\PCBWorks <GUID> folder for that installation.
Changing Installed Core Functionality after Installation
During initial installation of PCBWorks, you have a choice over the core design functionality you want to be installed. This choice is not 'set in stone' however, and can be modified at any time after installation. This can be performed from two places:
- Internally from within PCBWorks – from the Installed page of the Extensions & Updates area.
- Externally from within Windows – from the standard Programs and Features page (accessed from the Control panel in Windows 8/7).
From PCBWorks
- Access the Extensions & Updates area by clicking the Extensions & Updates link, in the Tasks pane of PCBWorks's Home page.
- From the Extensions & Updates page, click the Installed link to access the Installed page for the area.
- Click the Configure control, at the top-right of the Platform region. This accesses the Configure Platform page, presenting the core feature set for the software – including platform extensions – and is identical in content to that found on the Select Design Functionality page of the PCBWorks Installer.
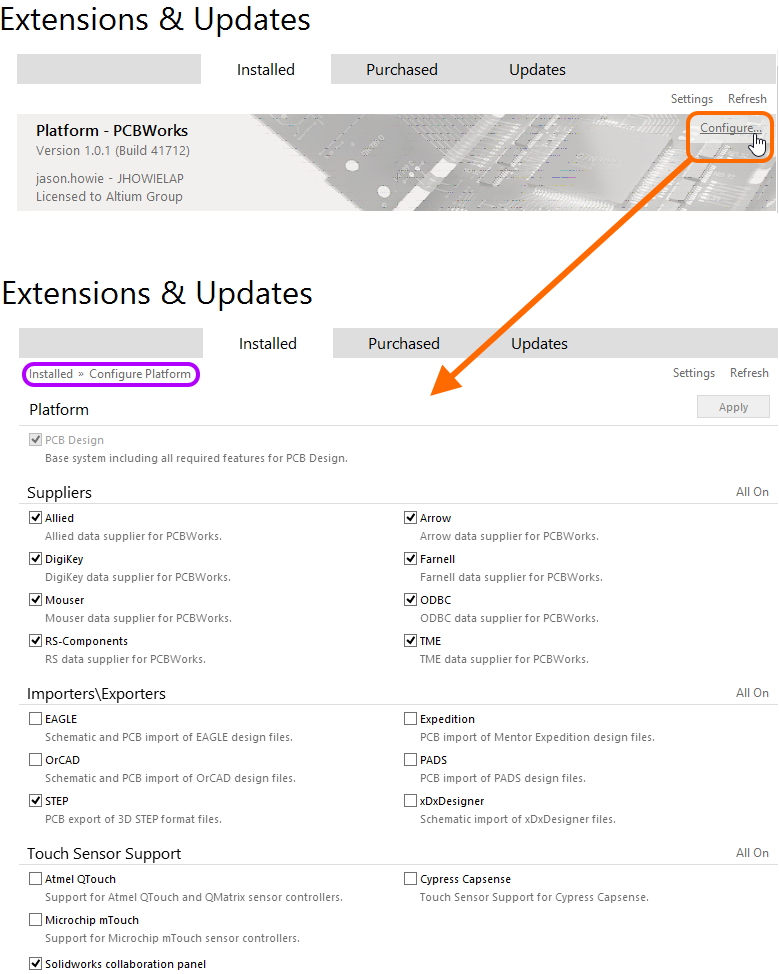
Make changes to the core functionality of your PCBWorks installation by configuring the platform from within the Extensions & Updates area.
- Make changes to the installed core feature set as required and click Apply. A confirmation dialog will appear, click OK to apply the changes and restart PCBWorks. The instance of PCBWorks will close and a window will appear showing progress, in terms of download of the files required to implement the change(s), followed by the installation of those files.
- PCBWorks will then be restarted.
From Windows
- Right-click on the entry for
PCBWorksand use the Change command from the context menu.
- The PCBWorks Installer wizard will be presented. Login through the Account Log In pop-up window, after which you will be taken to the Select Design Functionality page. Make changes to the installed core feature set as required and click NEXT.
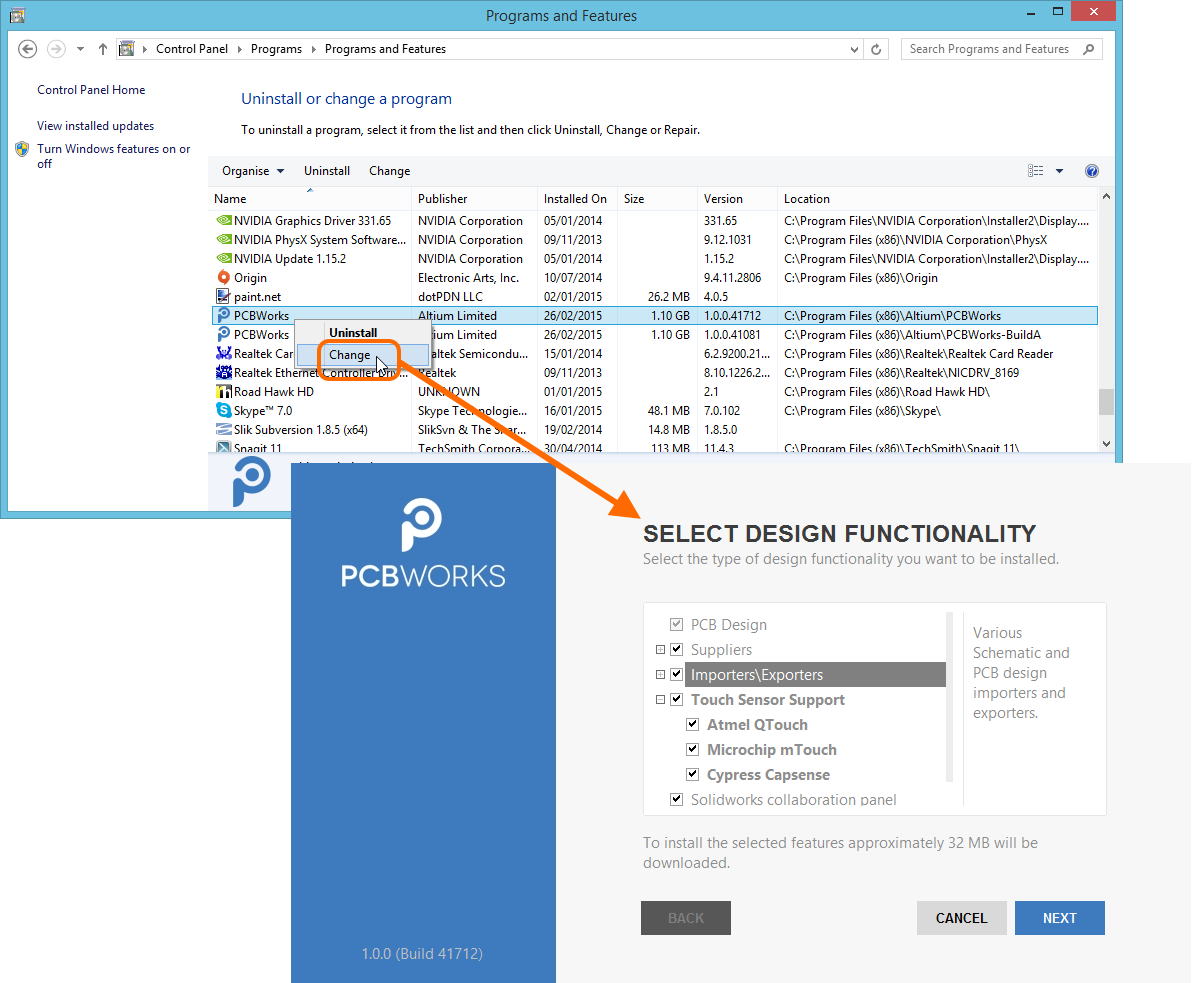
Modify the installation at any stage by changing the core functionality installed.
- The Ready To Modify page will be presented. At this point, the Installer has all the information it requires to proceed with modification of the installation. If you need to change anything, click the BACK button. If you want to cancel out of the install, click CANCEL. To go ahead and proceed with the modification, click NEXT. The page will change to Modifying PCBWorks and the files required to implement the change will be downloaded and then installed.
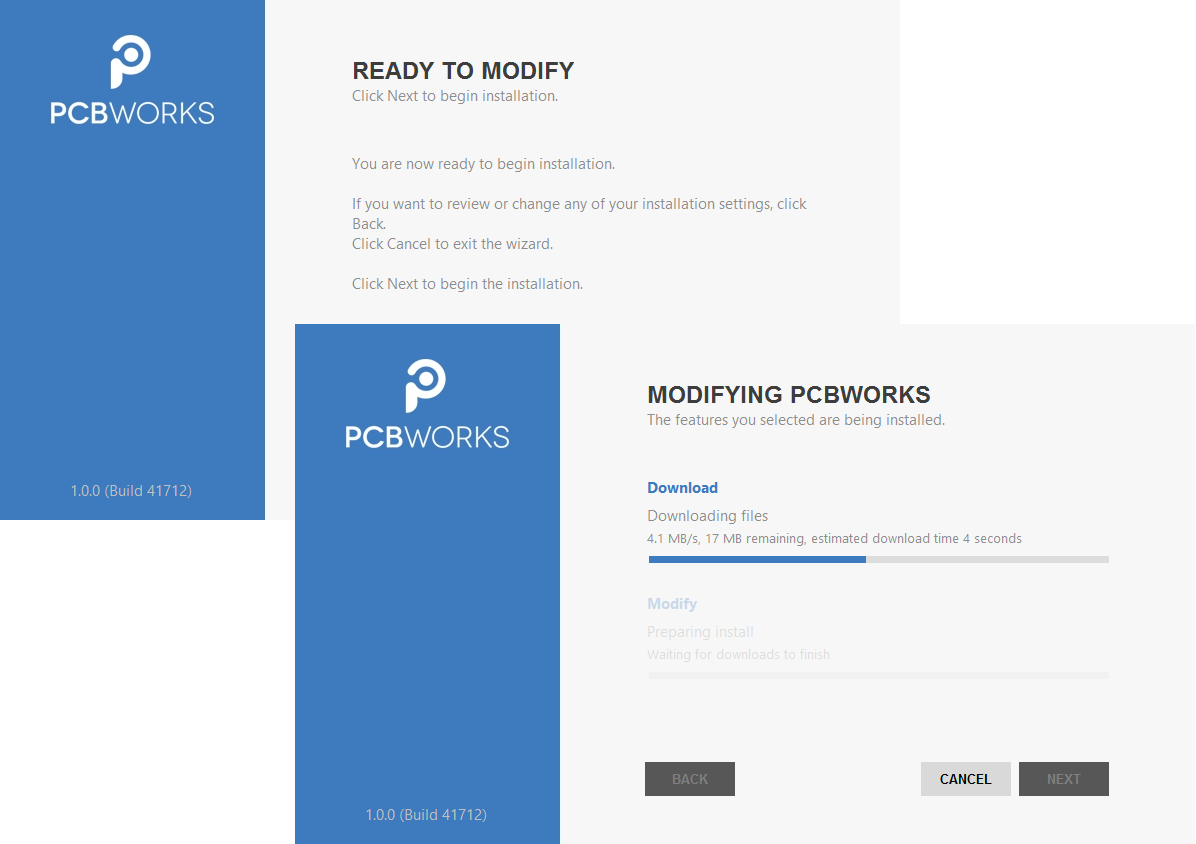
Modification of the installation proceeds by downloading the files required to implement desired changes to the software. Once downloaded, those files will be installed.
- With the modification to the installation complete, either re-launch PCBWorks by clicking RUN PCBWORKS, or exit the Installer without launching the software, by clicking FINISH.
Updating to a Later Version
This can be performed from two places:
- Internally from within PCBWorks – from the Updates page of the Extensions & Updates area.
- Externally from within Windows – from the standard Programs and Features page (accessed from the Control panel in Windows 8/7).
From PCBWorks
- Access the Extensions & Updates area by clicking the Extensions & Updates link, in the Tasks pane of PCBWorks's Home page.
- From the Extensions & Updates page, click the Updates link to access the Updates page for the area.
- When a new version of the platform is available, a notification will be present at the top-right of the Platform region.
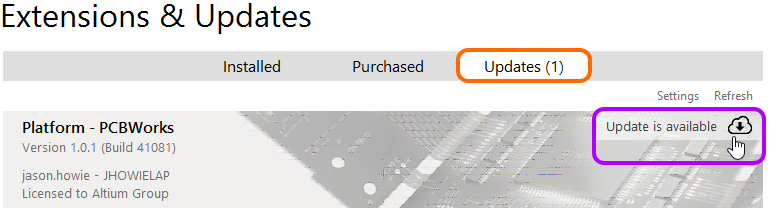
Update to a new version of PCBWorks, directly from within the current version.
- Click the
 icon to proceed with the update (hovering over the icon will reveal the version number of the new update). A progress bar will appear, showing progress of the download (essentially getting the installer for the later version from the source vault). Should you need to cancel the update, simply click its associated cancel icon ().
 - A confirmation dialog will appear, alerting you to the fact that a restart is required to install the platform update – click Yes. The instance of PCBWorks will close and a window will appear (essentially the Updating PCBWorks page of the installer dialog) showing progress, in terms of download of the files required to implement the update, followed by the installation of those files.
- PCBWorks will then be restarted.
From Windows
Updating your current instance of PCBWorks to a later version, is performed during installation of that later version.
- Download and run the PCBWorksSetup.exe file associated with the latest version of the software.
- Follow the installation process, using the PCBWorks Installer for the new version. After agreeing to the End-User License Agreement, you will be presented with the Installation Mode page. This page gives you the choice of either updating an existing version instance of PCBWorks, or installing as a separate new version instance. Choose the Update existing version option, then use the drop-down field to select the specific instance of the software you wish to update. The Program Files and Shared Documents install locations will be summarized based on the chosen instance.
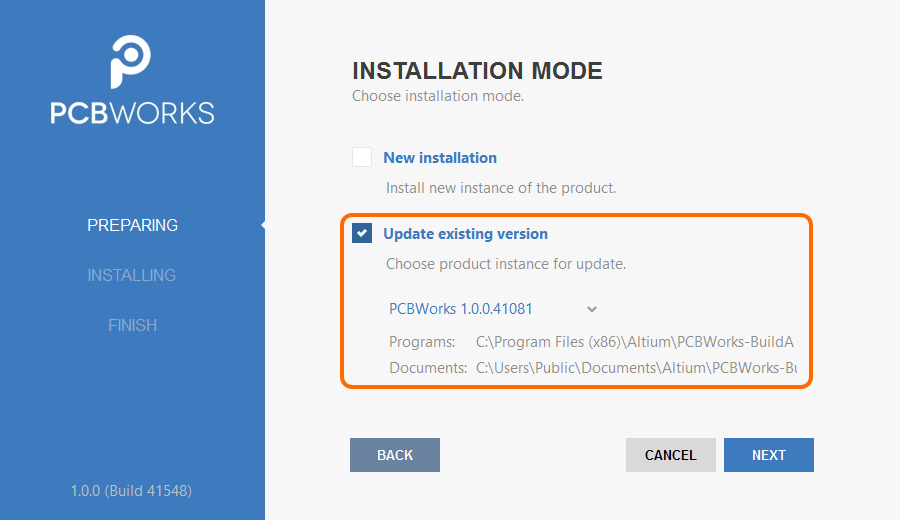
Choose to update an existing instance of PCBWorks during installation of a later version of the software.
- Click NEXT. The Ready To Update page will be presented. At this point, the Installer has all the information it requires to proceed with update of the existing installation. If you need to change anything, click the BACK button. If you want to cancel out of the install, click CANCEL. To go ahead and proceed with the update, click NEXT.
- Login through the Account Log In pop-up window. Once this is done, the page will change to Updating PCBWorks and the files required to implement the update will be downloaded and then installed.
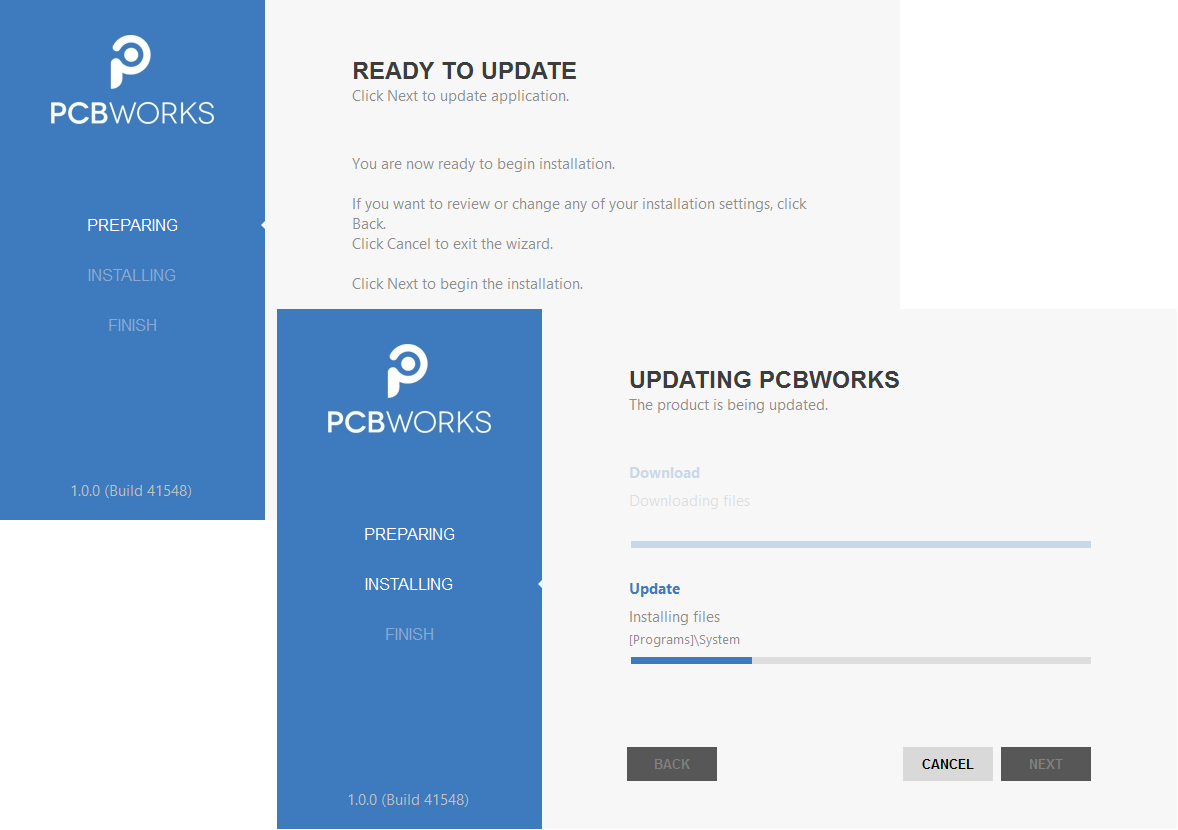
Update of the installation proceeds by downloading the files required to implement required changes to the software. Once downloaded, those files will be installed.
- With the update to the installation complete, either re-launch PCBWorks by clicking RUN PCBWORKS, or exit the Installer without launching the software, by clicking FINISH.
Uninstalling
Uninstalling PCBWorks is performed using the PCBWorks Uninstaller. This wizard-based uninstaller is accessed from the standard Programs and Features page (accessed from the Control panel) in Windows 8/7. Simply right-click on the entry for PCBWorks and use the Uninstall command from the context menu.
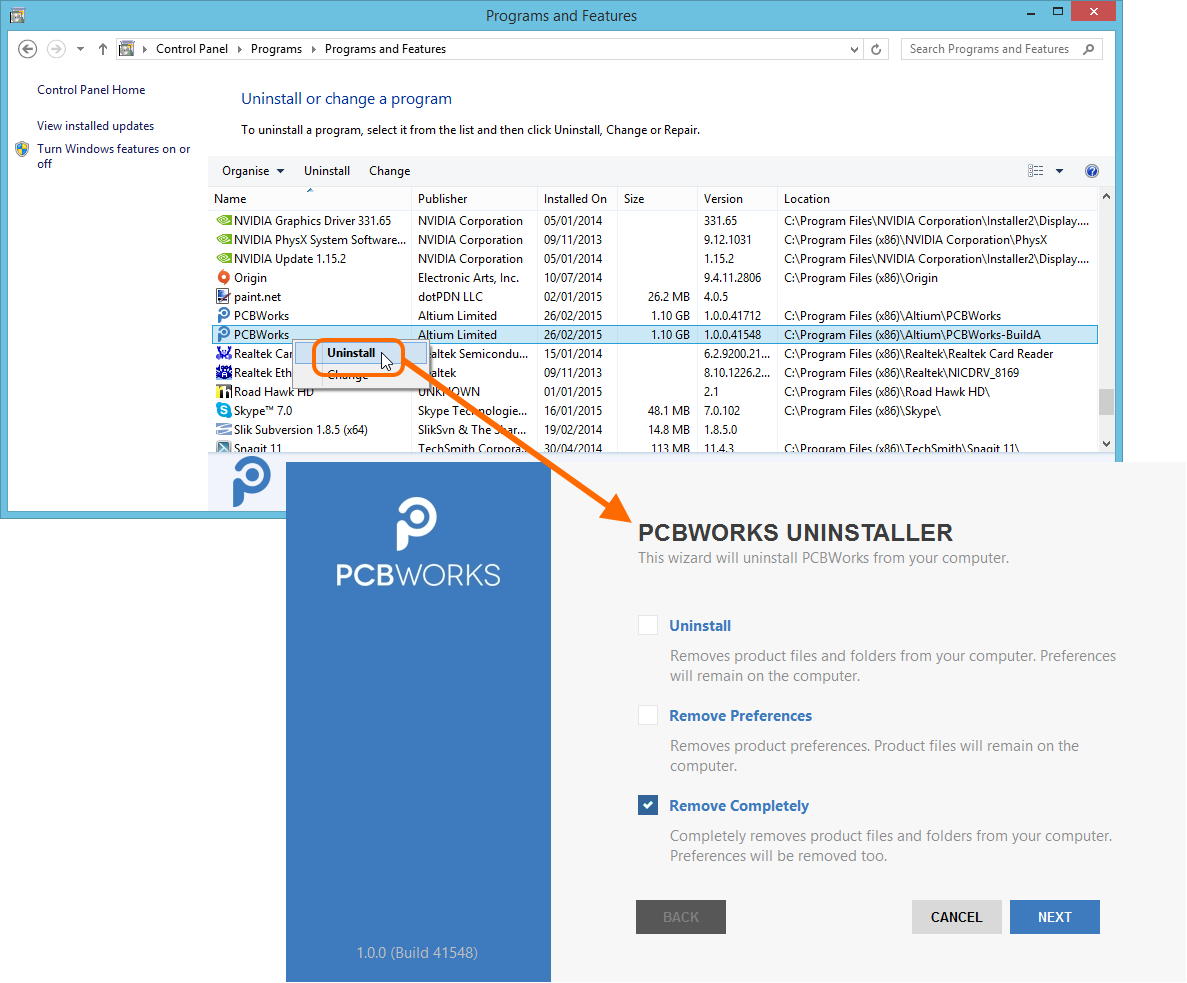
Uninstalling the software is streamlined, courtesy of the PCBWorks Uninstaller.
Three actions are provided, facilitating varying degrees of 'uninstall' as follows:
- Uninstall – removes the install folders (program files and shared documents locations) but leaves preferences-based folders alone. This enables you to have a build that is not currently installed, but whose preferences can still be reused, for example by loading into another installed version.
- Remove Preferences – removes just the preferences-based folders, covering system application data and security files, user application data files and user local application data.
- Remove Completely – total removal of the entire installation (i.e. installation folders and preferences folders).
Choose the uninstall action required. If you want to cancel out of the uninstall, click CANCEL. To go ahead and proceed with the uninstall, click NEXT. The page will change to Uninstalling PCBWorks and the chosen action will be processed. Once the uninstall is complete, simply click FINISH on the Uninstallation Complete page of the Uninstaller.
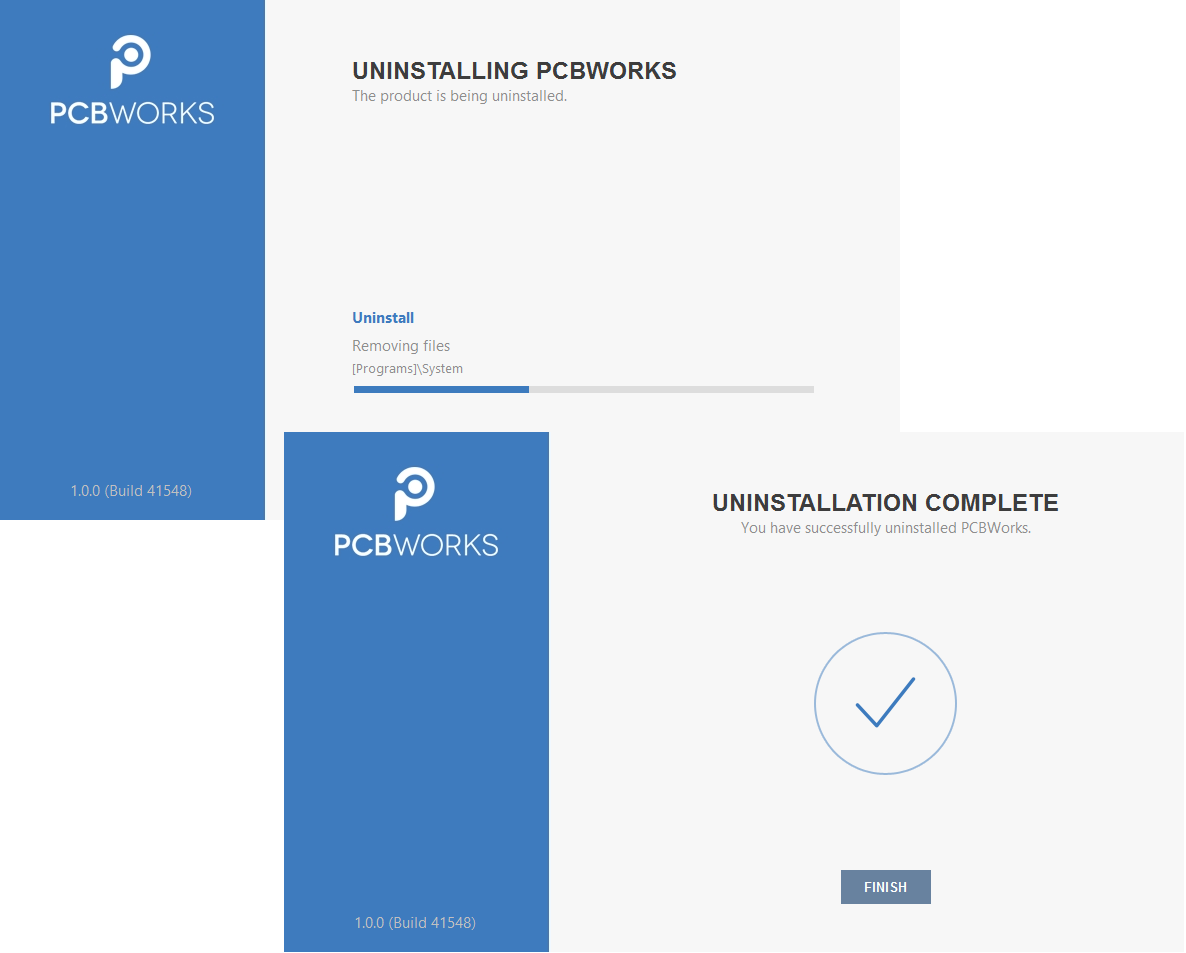
The PCBWorks Uninstaller in action!