Advanced Text Print Properties
Contents
Other Related Resources
Parent page: WorkspaceManager Dialogs
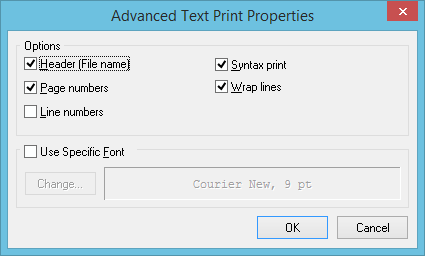
The Advanced Text Print Properties dialog.
Summary
This dialog allows the designer to configure more advanced properties when printing text documents.
Access
The dialog is accessed in the following ways:
- By clicking the Advanced button, in the Text Print Properties dialog.
- Right-clicking in the Print Preview dialog, and choosing the Configuration command from the context menu.
- With the entry for Text Print selected, on the Default Prints tab of the Project Options dialog (Project | Content |
 ), click the Configure button.
Options/Controls
- Header - enable this option to include a header on each printed page, consisting of the document's name, and full path information.
- Page Numbers - enable this option to include page numbers on the printed page(s).
- Line Numbers - enable this option to include line numbers on the printed page(s).
- Syntax print - enable this option to have any applicable syntax highlighting also displayed on the printed page(s).
- Wrap lines - enable this option to have text on the printed page wrapped.
- Use Specific Font - enable this option to use a different font for printed text. With this option disabled, the text used will be that defined in the Font region, on the Text Editors - Display page of the Preferences dialog.
- Currently Used Font - this field shows the font that will be used for printed text if the Use Specific Font option is enabled. The entry reflects the name of the chosen font, and its point size.
- Change - click this button to access the standard Font dialog, with which to choose and configure the intended print font as required.